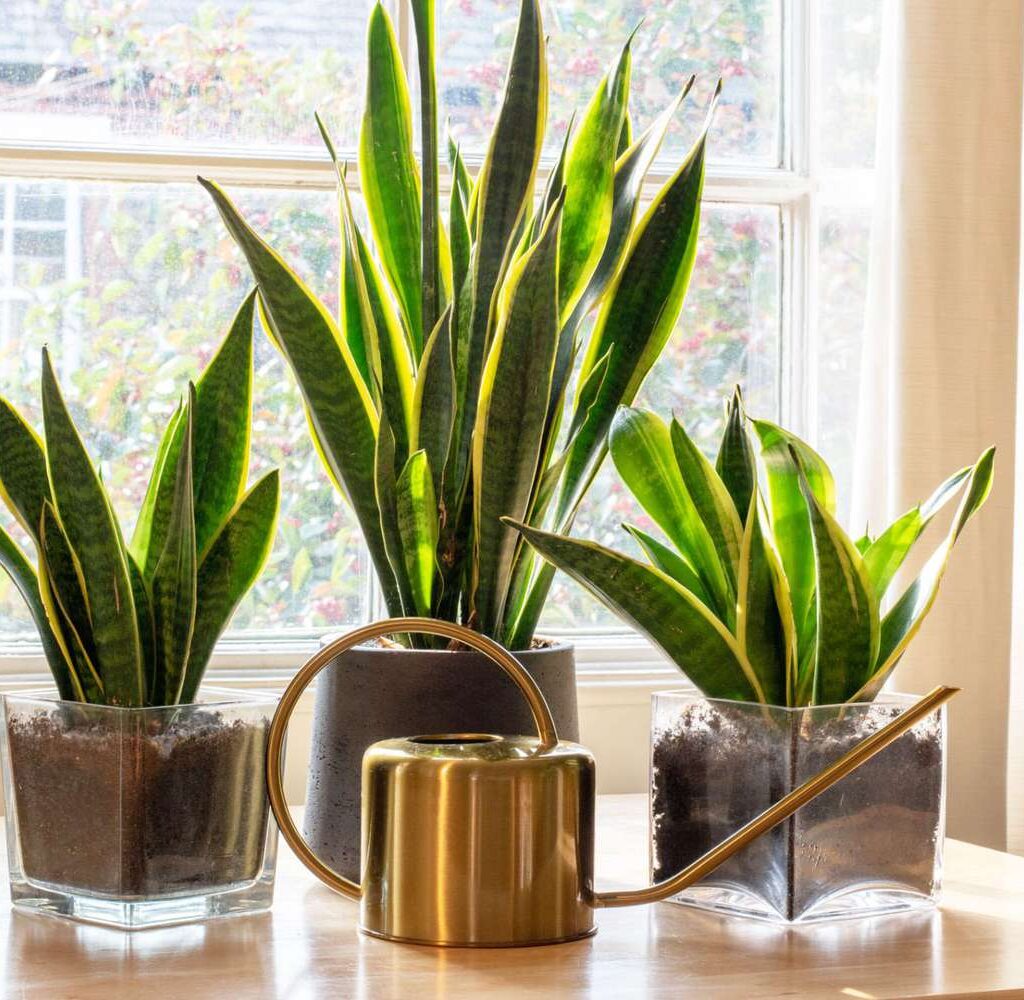
The snake plant (Sansevieria trifasciata), also known as mother-in-law’s tongue, is a popular indoor plant known for its architectural leaves, air-purifying qualities, and low maintenance. One of the most satisfying aspects of owning a snake plant is how easily it can be propagated, allowing plant lovers to multiply their collection or share with friends.
There are two primary methods of propagation for snake plants: in water and in soil. Both techniques are effective but offer different experiences and results. This article explores both methods in depth—covering step-by-step instructions, pros and cons, and tips to ensure success.

Why Propagate Snake Plants?
Before diving into the propagation techniques, it’s worth understanding why propagation is so popular:
- Cost-Effective: Instead of buying more plants, propagate from the one you have.
- Gift Giving: Homemade plants make thoughtful, sustainable gifts.
- Plant Health: Propagation can help rejuvenate an overgrown or leggy snake plant.
- Fun Gardening Hobby: Watching roots form and leaves grow from a single cutting is incredibly rewarding.
Best Time to Propagate Snake Plants
The ideal time to propagate is during the spring or summer, when the plant is actively growing. Propagation can be done in colder months, but root formation may be slower.

Water Propagation Method
Step-by-Step Guide
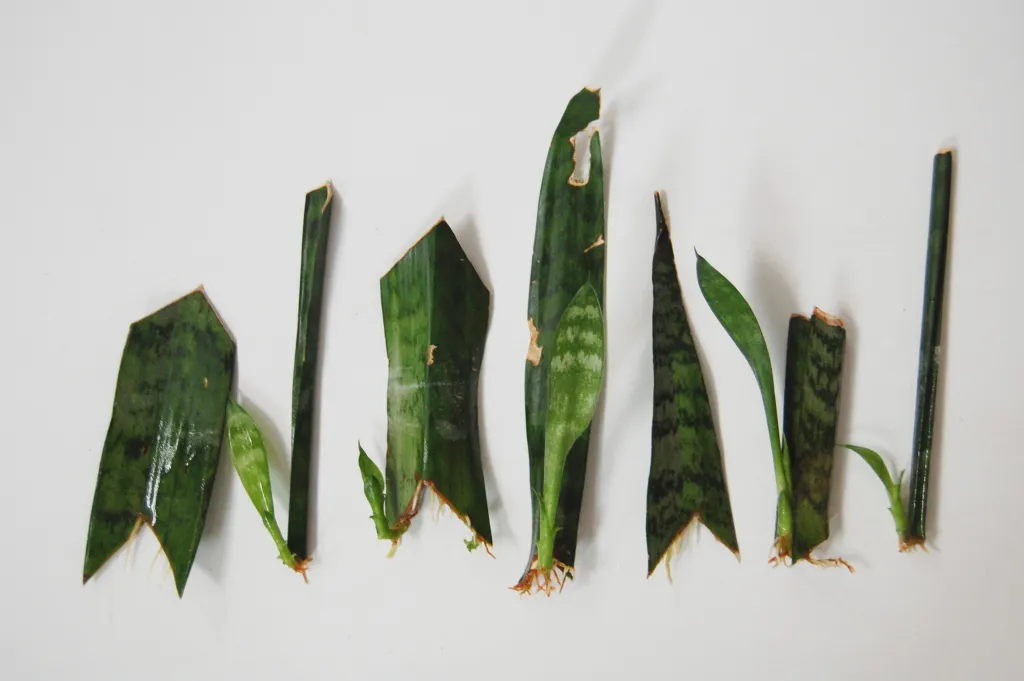
- Choose a Healthy Leaf
Select a mature, healthy leaf from the base of the plant. Avoid leaves that are yellowing, damaged, or diseased. - Cut the Leaf
Use clean, sharp scissors or pruning shears to cut the leaf at the base. Then, cut the leaf into 3–4 inch (8–10 cm) segments. Make sure to mark the bottom end of each segment so you don’t plant it upside down (roots form from the bottom only). - Let It Callous (Optional but Recommended)
Allow the cuttings to sit for 1–2 days in a dry, shaded area so the cut ends can callous. This helps prevent rotting in water. - Place in Water
Put the cuttings in a clean glass jar with about an inch of water, ensuring only the bottom ends are submerged. Use room temperature, filtered water if possible. - Find the Right Spot
Place the jar in a bright, indirect light location. Avoid direct sun, which can cause heat stress. - Change the Water Weekly
Replace the water every 5–7 days to prevent bacteria buildup and keep the water oxygenated. - Wait for Roots
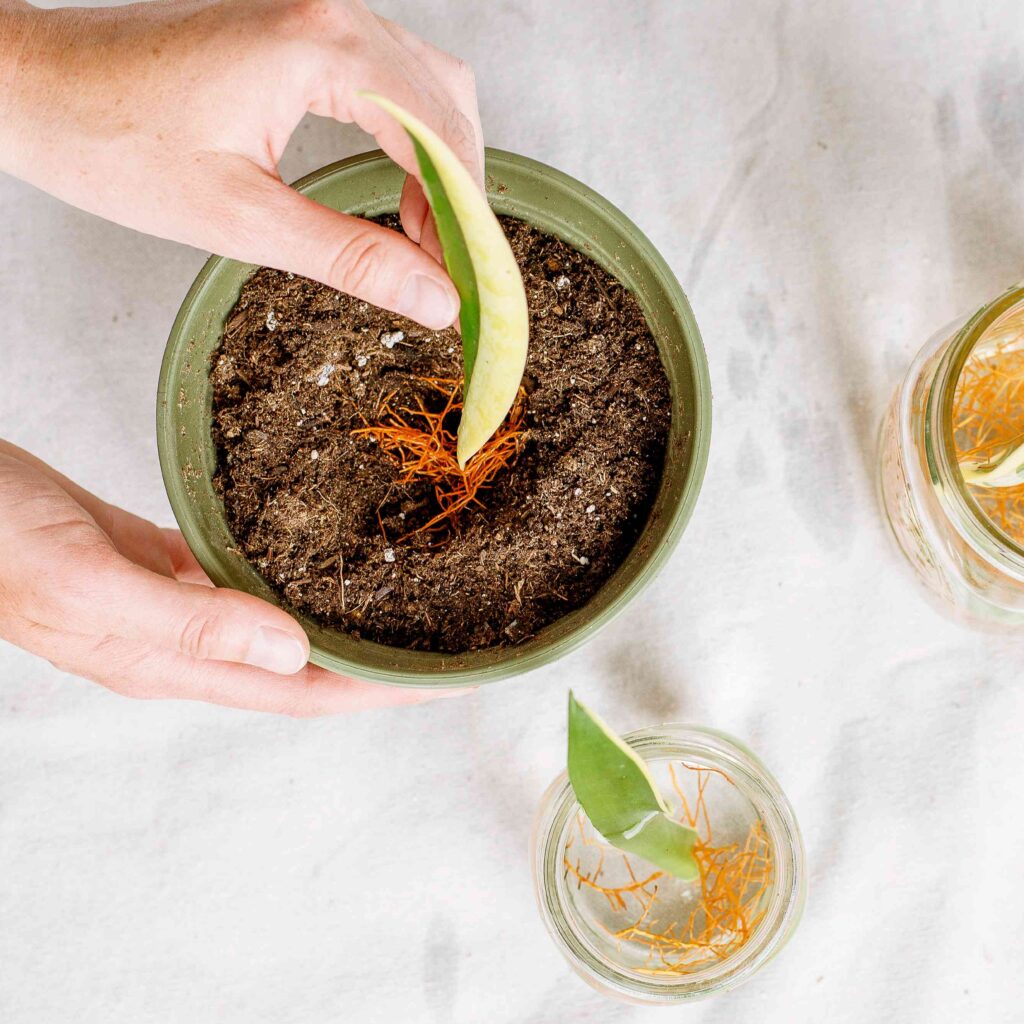
Within 4–8 weeks, roots should start forming. You might even see small baby shoots (pups) emerging from the bottom. - Transfer to Soil (Optional)
Once roots are at least 1–2 inches long, you can transplant the cutting into soil. Use a well-draining mix (like cactus soil or one made for succulents).
Pros of Water Propagation
- Visually Satisfying: You can see the roots grow day by day.
- Low Mess: No soil involved initially, making it clean and simple.
- Educational: Great for kids or beginners to learn about plant growth.
Cons of Water Propagation
- Slower Transition: Water roots may not adapt well to soil, leading to transplant shock.
- Risk of Rot: If left too long or water isn’t changed, rot can occur.
Soil Propagation Method
Step-by-Step Guide
- Cut a Healthy Leaf
Just like in the water method, select a robust leaf and cut it into 3–4 inch segments, marking the bottom ends. - Let It Callous
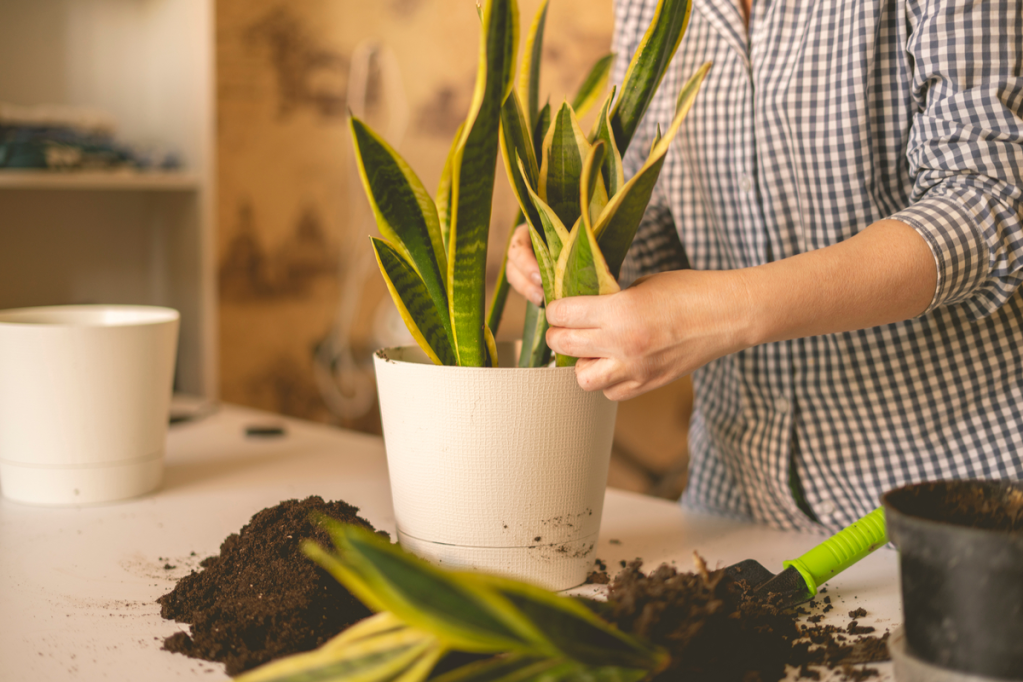
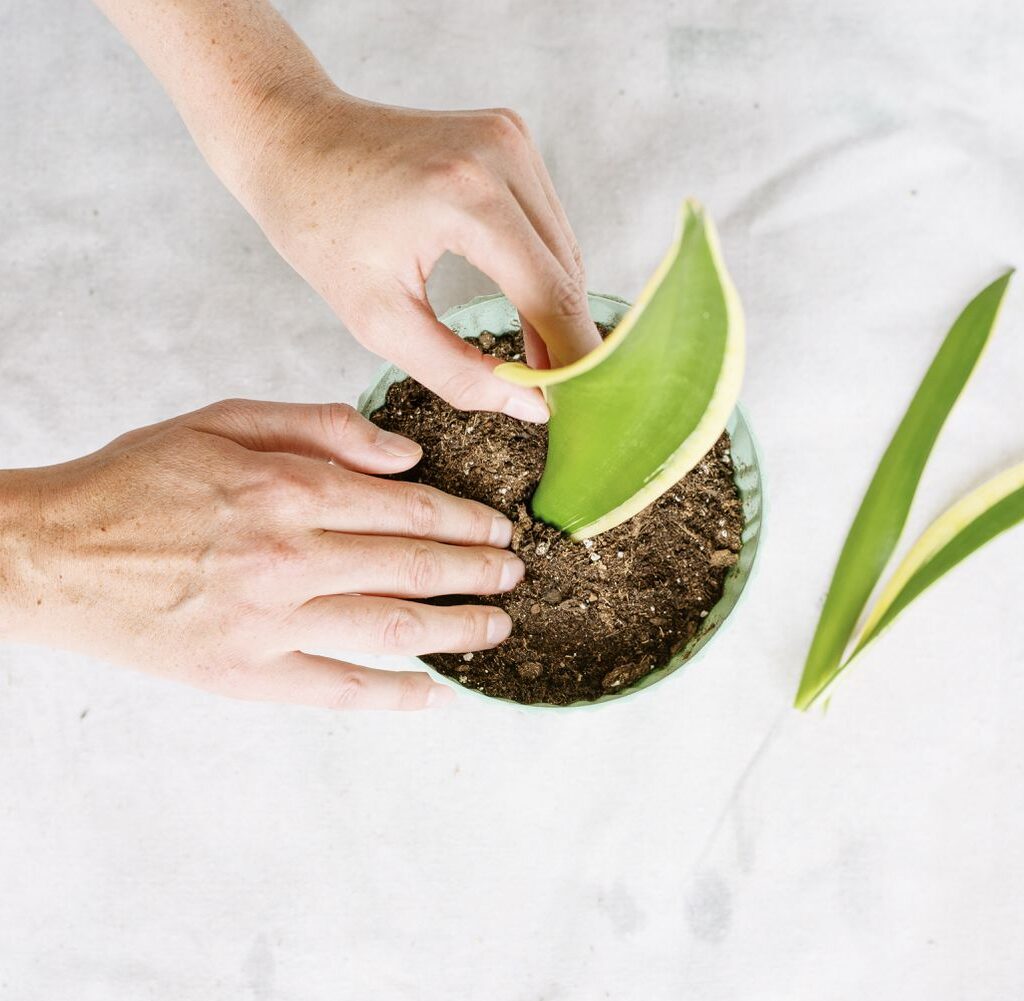
Dry the segments for 1–2 days until the cut ends are dry and sealed. - Plant in Soil
Use a pot filled with well-draining soil—preferably a succulent or cactus mix. Insert the cuttings an inch deep into the soil, bottom side down. - Water Sparingly
Lightly water the soil after planting, then wait until the soil is fully dry before watering again. Overwatering is the top killer of new cuttings. - Create a Mini Greenhouse (Optional)
To retain humidity, cover the pot with a clear plastic bag or container. Ensure it doesn’t touch the leaves and is ventilated to prevent mold. - Provide Indirect Light
Keep the pot in a bright, warm location but out of direct sunlight. - Wait for Roots and Pups
Soil propagation is slower, often taking 6–10 weeks for roots to develop and even longer for pups to emerge.
Pros of Soil Propagation
- No Transplant Needed: Once roots develop, the plant is already in its permanent pot.
- Less Shock: Plants grown directly in soil usually adapt better and grow faster once established.
- Lower Rot Risk: Calloused cuttings in dry soil are less prone to rotting.
Cons of Soil Propagation
- Invisible Progress: You can’t see root development, which may be discouraging for beginners.
- Longer Wait: The rooting process is often slower compared to water.
Tips for Successful Snake Plant Propagation
- Always Use Clean Tools: Dirty shears or containers can introduce bacteria or fungi.
- Label the Bottom End: Snake plant cuttings won’t root if planted upside down.
- Be Patient: Whether using water or soil, snake plants are slow to root.
- Don’t Overwater: Snake plants are drought-tolerant and prefer slightly dry conditions.
- Use Rooting Hormone (Optional): Especially in soil propagation, it can speed up root formation.
Which Method is Better? Water or Soil?
The “best” method depends on your personal preference:
| Feature | Water Propagation | Soil Propagation |
|---|---|---|
| Visibility of Roots | Yes | No |
| Ease of Setup | Very Easy | Slightly More Complex |
| Risk of Rot | Higher | Lower |
| Transplant Shock Risk | Moderate | Low |
| Growth Speed | Fast Rooting | Fast Establishment |
Many gardeners start with water propagation for the visual satisfaction and then move the cuttings to soil once roots develop. Others prefer keeping things simple with direct soil planting.

Conclusion
Snake plant propagation is one of the easiest and most fulfilling plant-care activities you can do at home. Whether you choose water or soil, the process requires minimal effort and patience. By understanding the strengths and weaknesses of each method, you can confidently multiply your greens, share with others, and enjoy the satisfaction of growing new life from just a leaf.
So next time you see a healthy snake plant leaf, don’t throw it away—propagate it and start your next green adventure!