Imagine snipping fresh basil for your homemade pasta, or plucking sprigs of mint for a calming tea — all without leaving your kitchen. Growing herbs indoors isn’t just a charming hobby; it’s a practical, rewarding, and surprisingly simple way to bring flavor, fragrance, and a touch of green serenity into your home.
Whether you live in a spacious house or a small city apartment, cultivating your own indoor herb garden is well within reach. In this comprehensive guide, we’ll cover everything you need to know to get started, from choosing the right herbs and containers to essential care tips for keeping your indoor garden thriving year-round.
Why Grow Herbs Indoors?
Before we dive into the how-to, let’s look at the many perks of growing herbs inside your home:
- Fresh, organic herbs anytime: No need for last-minute grocery runs.
- Space-saving: Perfect for kitchens, windowsills, balconies, and small apartments.
- Year-round harvest: Enjoy fresh herbs regardless of the season.
- Budget-friendly: Save money compared to store-bought herbs.
- Aesthetic and therapeutic: Greenery boosts mood, purifies the air, and adds natural beauty to your space.
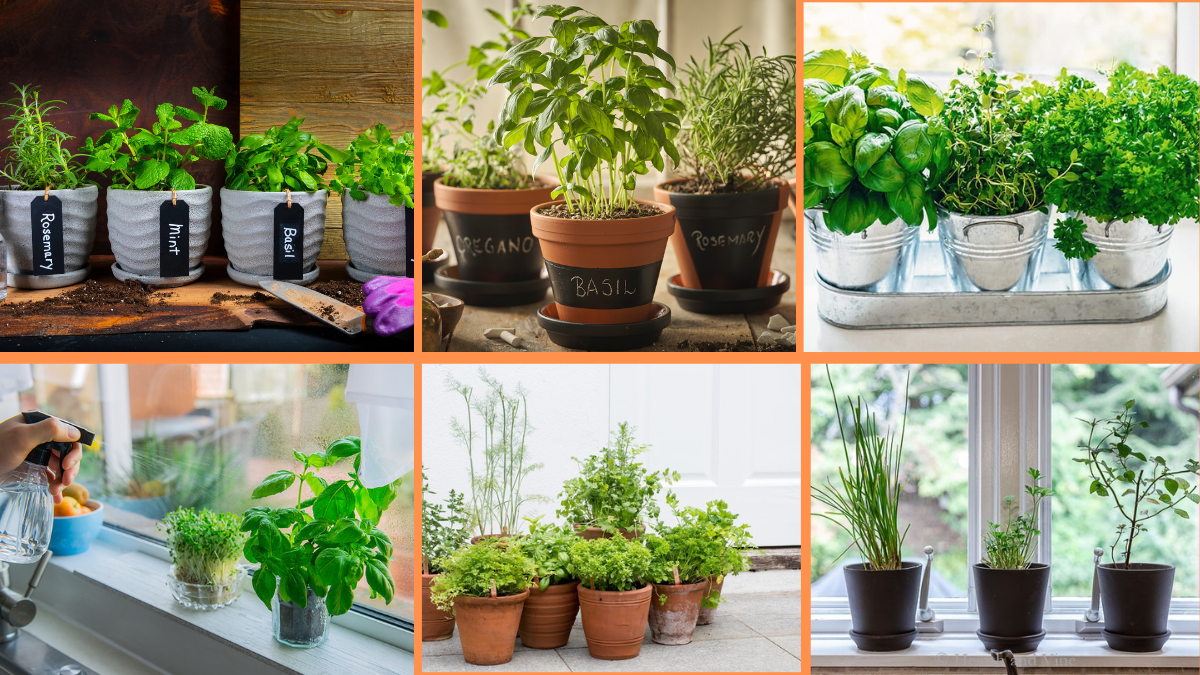
Step 1: Choose the Right Herbs to Grow Indoors
Not all herbs are equally suited to indoor life, but many popular culinary herbs adapt wonderfully to indoor conditions.
Top Herbs for Indoor Growing:
- Basil: Loves warmth and sunlight — great for Mediterranean dishes.
- Mint: Hardy and aromatic — perfect for teas, desserts, and cocktails.
- Chives: Easy to grow and ideal for garnishing salads, soups, and eggs.
- Parsley: Versatile and nutrient-rich.
- Cilantro: A must for Mexican, Asian, and Middle Eastern cuisines.
- Thyme: Aromatic and a staple for roasts and stews.
- Oregano: Pairs wonderfully with Italian dishes and pizzas.
- Rosemary: Woody herb with a strong flavor — excellent for meats and bread.
Tip: Start with 3-5 of your favorite herbs. As you gain confidence, you can expand your indoor collection.

Step 2: Pick the Perfect Spot in Your Home
Herbs, like all plants, need light and warmth to thrive. The key to a healthy indoor herb garden is finding a location that mimics their outdoor conditions.
Ideal Growing Conditions:
- Sunlight: Most herbs require 6-8 hours of bright, indirect sunlight daily. South- or west-facing windows are ideal.
- Temperature: Herbs thrive in temperatures between 65°F to 75°F (18°C to 24°C).
- Air circulation: Ensure good airflow around plants to prevent mold and pests.
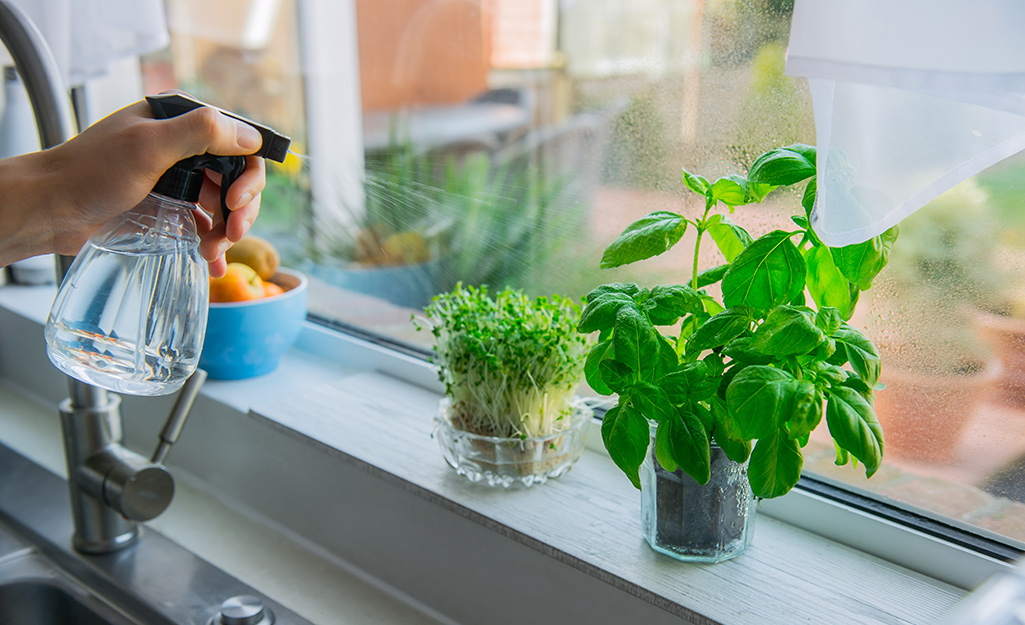
- Humidity: Most herbs prefer moderate humidity. If your home is dry, mist plants occasionally or place a tray of water nearby.
Pro Tip: If natural light is limited, invest in a grow light to provide your herbs with sufficient brightness.
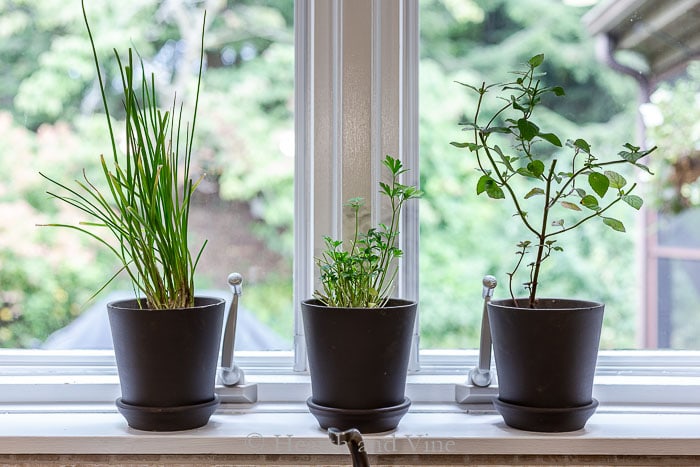
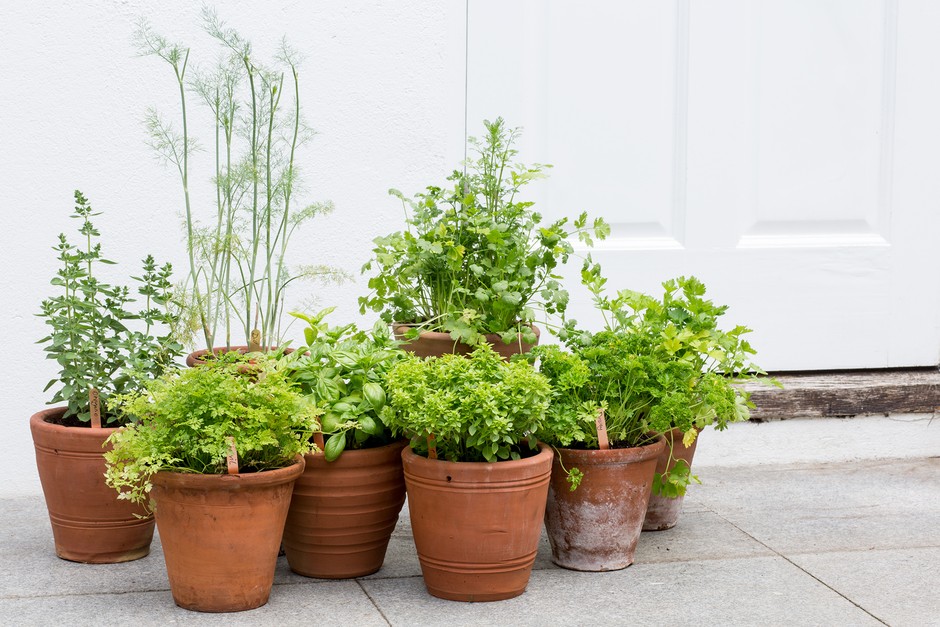
Step 3: Select Containers with Good Drainage
Proper containers are vital for healthy root systems and avoiding overwatering.
Container Tips:
- Use pots with drainage holes to prevent root rot.
- Opt for containers sized appropriately for each herb’s growth habit. For instance:
- Small pots for chives and thyme.
- Medium pots for basil and cilantro.
- Larger pots for mint (which can spread rapidly).
- Use trays or saucers under pots to catch excess water.
Aesthetic Idea: Mismatched vintage mugs, terracotta pots, mason jars (with pebbles at the bottom), and wooden boxes can all serve as charming herb containers.
Step 4: Use the Right Soil Mix
Regular garden soil is too heavy for container herbs. Instead, use a light, well-draining potting mix designed for herbs or houseplants.
Optional: Mix in a handful of perlite or coarse sand to enhance drainage.
Avoid over-fertilized mixes. Herbs grown indoors need moderate nutrients and too much fertilizer can lead to excessive leaf growth with diminished flavor.
Step 5: Planting Your Herbs
You can start with either seeds or seedlings (young plants).
Seeds:
- Economical but require patience and consistent care.
- Follow instructions on seed packets regarding planting depth and spacing.
- Keep the soil evenly moist (not soggy) during germination.
Seedlings:
- Ideal for beginners looking for quicker results.
- Available at garden centers or nurseries.
- Gently loosen roots before planting and firm soil around the base.
Step 6: Watering and Feeding Your Herbs
Watering:
Herbs don’t like waterlogged soil. The rule of thumb:
- Check soil moisture with your finger; water when the top inch feels dry.
- Water thoroughly, letting excess drain out.
Feeding:
- Use an organic liquid fertilizer every 4-6 weeks during active growing months (spring and summer).
- Reduce or stop feeding in winter when growth slows.
Tip: Over-fertilizing can reduce the concentration of essential oils in herbs, lessening their flavor.
Step 7: Pruning and Harvesting
Regular pruning encourages bushy, healthy plants and prevents them from becoming leggy.
How to Prune:
- Pinch off the top leaves and stems with your fingers or scissors.
- Always leave a few inches of growth so the plant can regenerate.
- Remove any yellow, damaged, or dead leaves.
Harvesting:
- Harvest herbs in the morning when essential oil concentration is highest.
- Never remove more than one-third of the plant at a time.
Pro Tip: Frequent harvesting actually encourages more growth — so snip away!

Step 8: Dealing with Common Problems
Even indoors, herbs can face a few challenges:
Common Issues:
- Yellowing leaves: Often caused by overwatering or poor drainage.
- Leggy growth: Indicates insufficient light. Move closer to a window or add a grow light.
- Pests (aphids, spider mites): Rinse leaves with water or spray with a mild neem oil solution.
- Moldy soil: Improve airflow, reduce watering, and remove affected soil.
Creative Ideas for Indoor Herb Gardens
- Hanging planters: Save counter space by suspending herbs from the ceiling or window frames.
- Vertical wall gardens: Use wall-mounted planters for a decorative living herb wall.
- Windowsill trays: Line multiple small pots along sunny windows for a classic kitchen garden.
- Tiered plant stands: Great for displaying several herbs in limited space.
Bonus Tip: Label your herbs with small chalkboard signs or wooden sticks for a stylish, organized touch.

Final Thoughts
Growing herbs indoors is a simple yet rewarding way to bring nature into your home and enrich your cooking. With a little care, sunlight, and love, you’ll soon enjoy fresh, fragrant herbs year-round — right from your windowsill or kitchen counter.
Start small, experiment with a few favorites, and watch your indoor herb garden thrive. Not only will your meals be tastier, but your home will feel a little greener and brighter too.
So what are you waiting for? Pick up some pots, seeds, or seedlings today — and let your herb-growing adventure begin!