Avocados (Persea americana) have become a global favorite thanks to their creamy texture, rich flavor, and impressive nutritional benefits. Whether enjoyed on toast, in salads, or as guacamole, this fruit is both delicious and versatile. But beyond the kitchen, avocados also hold a special place in gardening. Growing an avocado from seed is a fun, rewarding, and educational experience. It allows you to witness the miracle of life as a seed transforms into a thriving young tree.
While growing an avocado tree from seed takes patience, it’s a fantastic project for beginners, families, and anyone who loves plants. Even if your tree never bears fruit, it makes a beautiful, lush houseplant. This step-by-step guide will walk you through everything you need to know about sprouting, planting, and nurturing your avocado seed into a growing tree.
Introduction to Avocado Growing
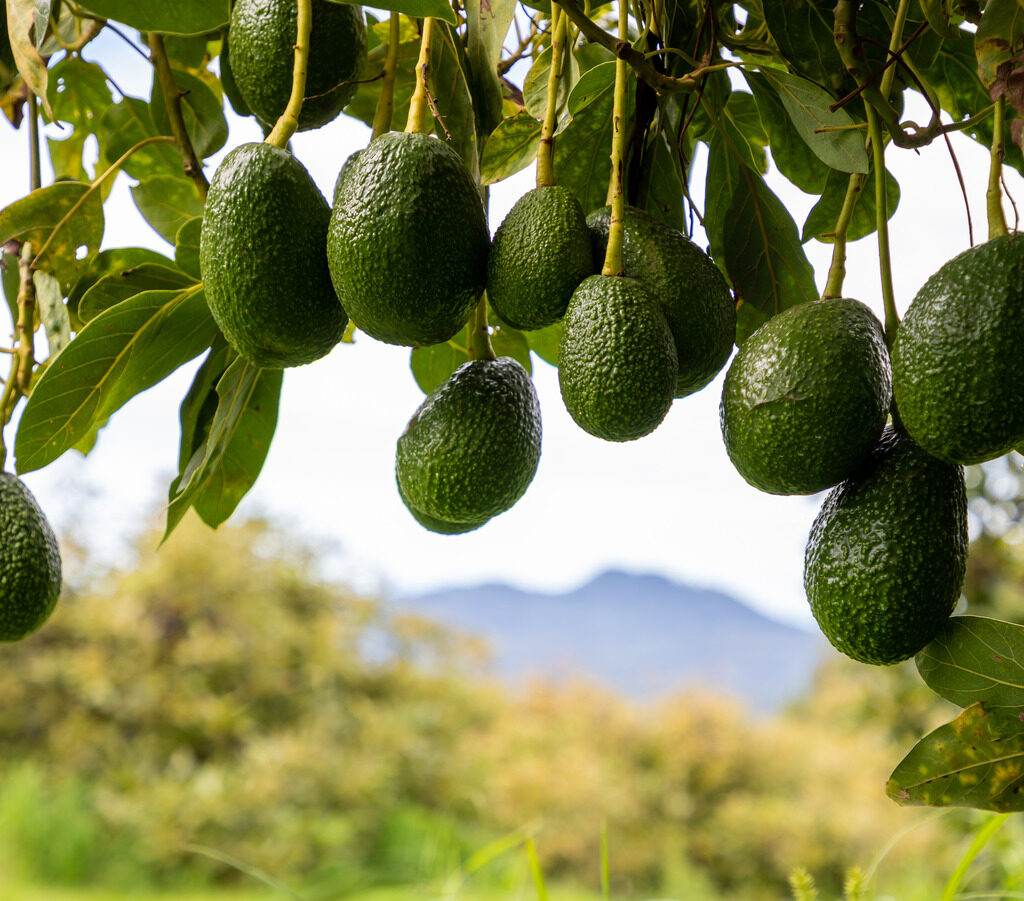
Avocados are native to Central and South America and have been cultivated for thousands of years. The fruit grows on evergreen trees that can reach 30–40 feet outdoors in warm climates. However, when grown indoors from seed, they typically remain much smaller and more manageable.
It’s important to note that while growing avocados from seed is fun, the resulting plant may not always produce fruit—or if it does, it may take 5–10 years. Commercial growers usually graft avocado trees to ensure predictable fruiting. Still, the process of growing from seed lets you enjoy the beauty of a thriving green tree in your home or garden.

Step 1: Preparing the Avocado Seed
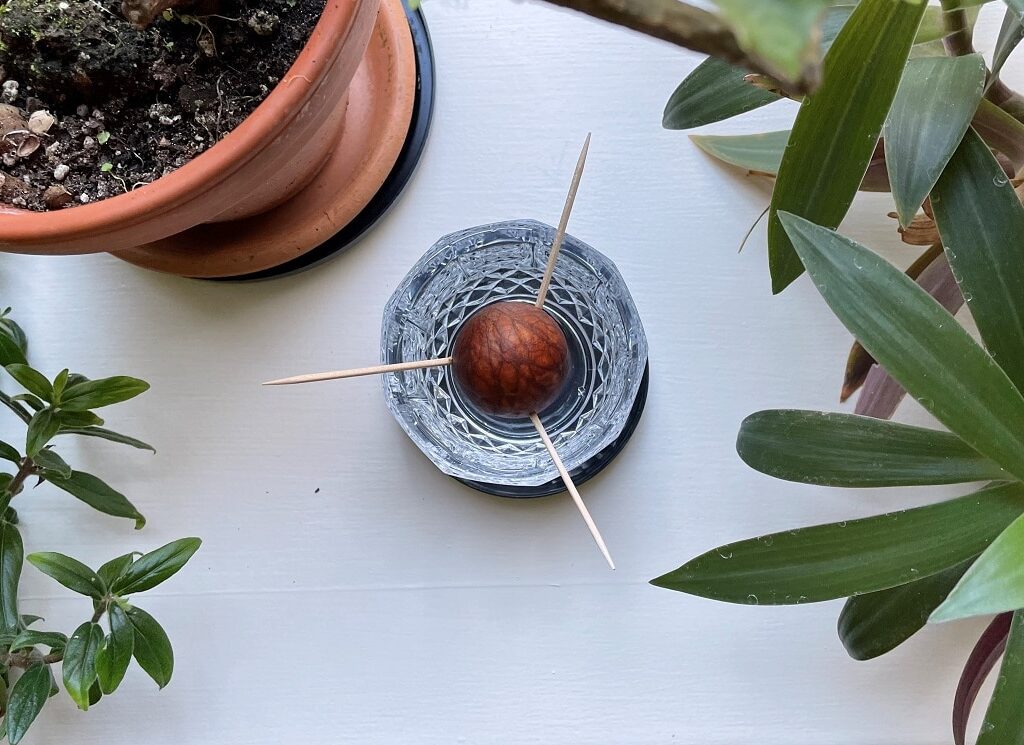
After enjoying a fresh avocado, don’t throw away the seed! It’s the starting point for your new tree.
- Remove and Clean the Seed – Gently remove the seed from the fruit and rinse it under lukewarm water. Be careful not to remove the brown skin, which protects the seed.
- Identify Top and Bottom – The slightly pointed end is the top (where the sprout will emerge), while the flatter, broader end is the bottom (where roots will grow).
- Optional: Peel the Seed – Some growers carefully peel the thin outer skin for faster sprouting, but this is not essential.
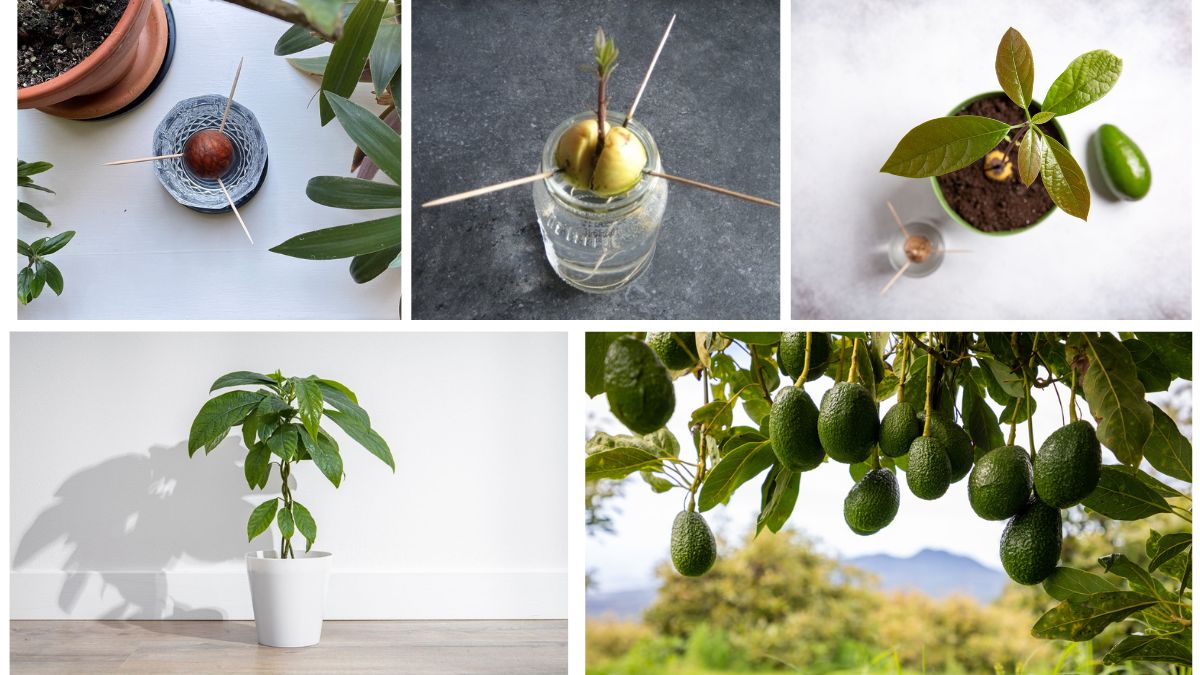
Step 2: Germinating the Seed
There are two common methods for sprouting an avocado seed:
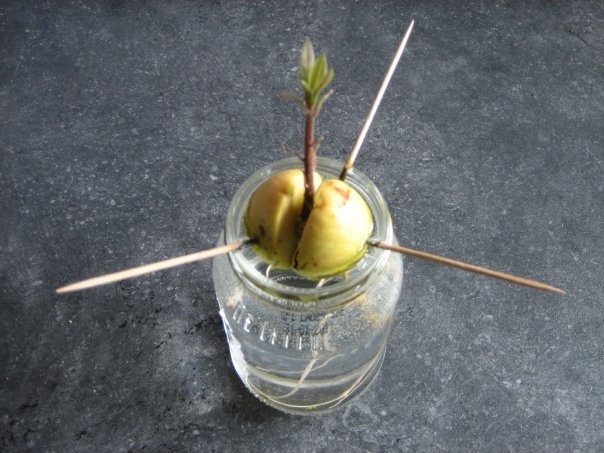
1. Water Method (Popular for Beginners)
This is the classic way to watch the seed sprout roots and shoots.
- Insert 3–4 toothpicks into the sides of the seed at a slight angle.
- Suspend the seed over a glass of water with the flat end submerged about 1 inch.
- Place the glass in a warm, bright spot, avoiding direct sunlight.
- Change the water every 3–5 days to keep it fresh.
In 2–8 weeks, you’ll see the seed crack open, roots grow downward, and a shoot emerge upward.

2. Soil Method
For a more natural approach, plant the seed directly in soil.
- Fill a small pot with loose, well-draining potting mix.
- Bury the bottom half of the seed in soil, leaving the top half exposed.
- Water lightly and keep the soil moist.
- Place in a warm location with indirect sunlight.
This method is less decorative than the water method but often results in faster, stronger seedlings.
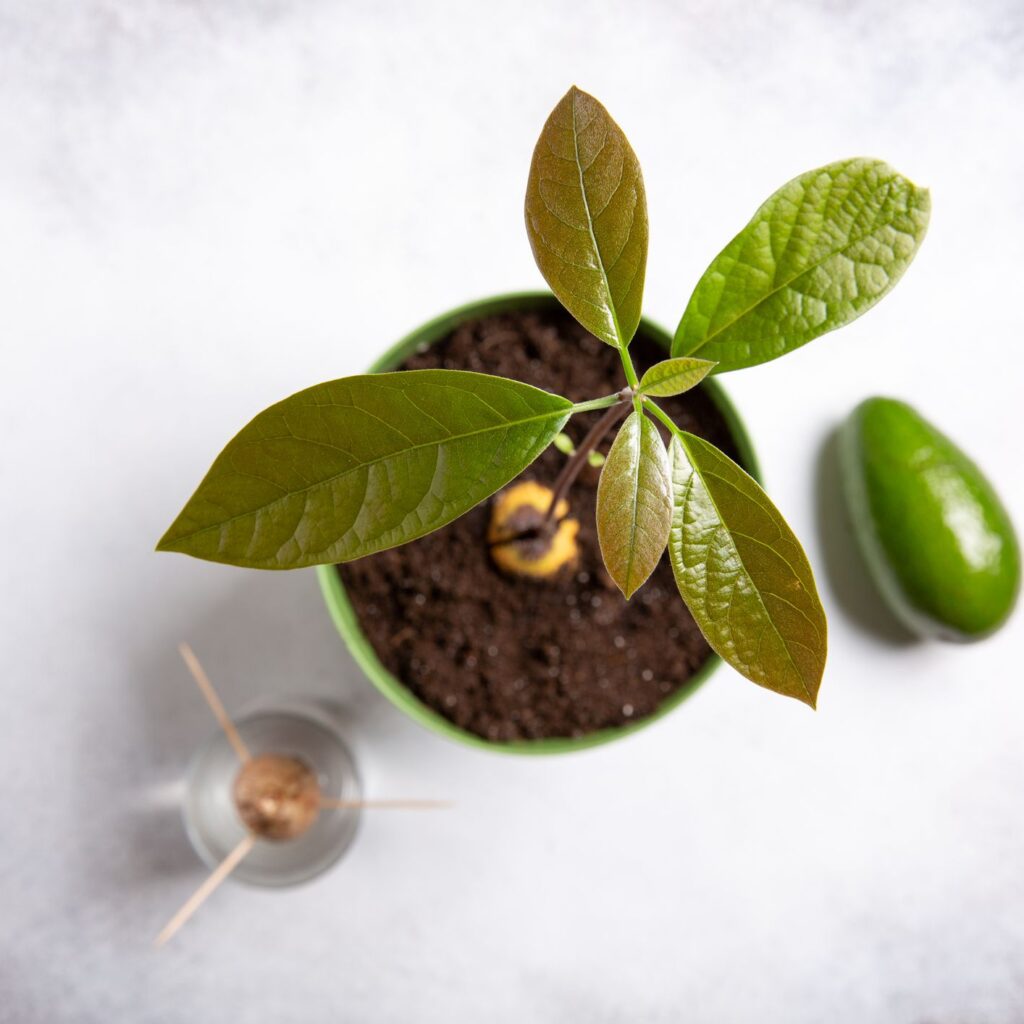
Step 3: Transplanting the Seedling
Once your avocado seed has sprouted and the stem is 6–8 inches tall, it’s time to transplant it into a pot.
- Prepare a Pot – Choose a container at least 8–10 inches wide with drainage holes.
- Potting Mix – Use a light, well-draining soil mix (a blend of peat, perlite, and compost works well).
- Planting Depth – Position the seed so the top half remains above the soil.
- Watering – Water thoroughly after planting, then allow soil to dry slightly before watering again.
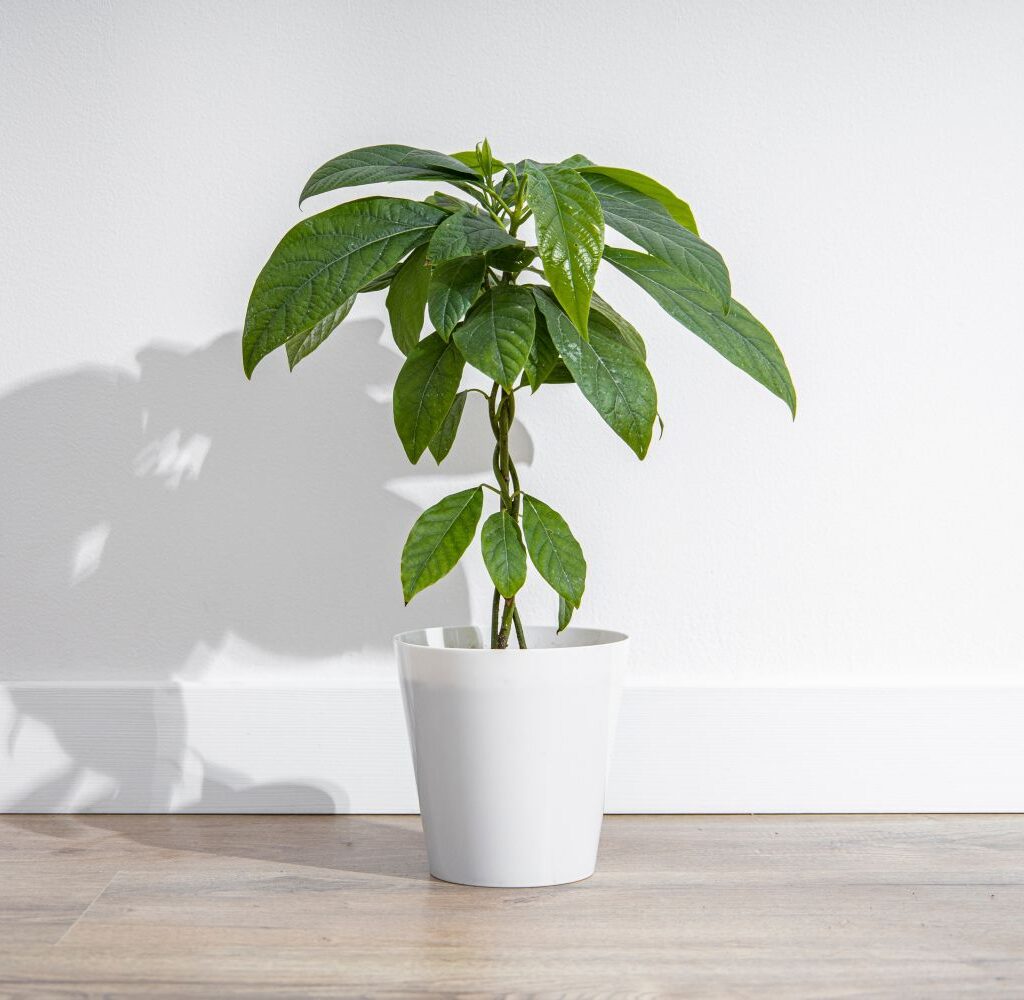
Step 4: Caring for Your Young Avocado Tree
Avocado trees are relatively low-maintenance, but they do have specific needs to thrive.

1. Light Requirements
- Avocados love sunlight! Place your plant near a south-facing window or outdoors in partial sun.
- Provide at least 6 hours of indirect to direct light daily.
- If growing indoors in low light, use a grow light to support growth.
2. Watering
- Keep soil moist but never soggy.
- Overwatering causes root rot, so allow the top inch of soil to dry between watering.
- Reduce watering slightly during winter when growth slows.
3. Temperature & Humidity
- Ideal range: 60–85°F (15–29°C).
- Protect your plant from frost, as avocados are sensitive to cold.
- If indoors, increase humidity by misting leaves or placing the pot on a pebble tray with water.
4. Fertilization
- Start feeding your avocado plant about 3–4 months after sprouting.
- Use a balanced liquid fertilizer (10-10-10) every 4–6 weeks during spring and summer.
- In fall and winter, reduce or pause fertilization.
5. Pruning
- Pinch back the top leaves when the stem reaches 8–10 inches tall. This encourages branching and fuller growth.
- Continue pruning as needed to shape the tree and prevent legginess.
Step 5: Repotting and Outdoor Transition
As your avocado tree grows, it will eventually need a larger pot. Repot every 12–18 months or when roots start circling the container.
- Choose a pot that is 2–3 inches larger in diameter than the old one.
- Refresh soil with compost and organic matter during repotting.
- In warmer climates, you can transition your tree outdoors after 1–2 years, planting it in the ground if space allows.
Step 6: Flowering and Fruiting Expectations
One of the most common questions beginners ask is: Will my avocado tree produce fruit?
- Trees grown from seed may take 5–10 years (sometimes longer) to flower.
- There’s no guarantee that a seed-grown tree will produce fruit, as many commercial avocados are grafted for consistent yields.
- Even if your tree doesn’t bear fruit, it will still grow into a beautiful ornamental plant.
If you want guaranteed fruiting, consider buying a grafted avocado tree from a nursery.
Step 7: Common Problems and Solutions
Even healthy avocado seedlings may face challenges. Here’s how to address them:

- Yellowing Leaves – Usually caused by overwatering or poor drainage. Adjust watering habits.
- Brown Leaf Tips – May result from low humidity, salt buildup, or inconsistent watering. Flush soil occasionally and mist leaves.
- Leggy Growth – Insufficient sunlight. Move plant to a brighter location or use grow lights.
- Pests (Spider Mites, Aphids, Mealybugs) – Wipe leaves with neem oil or insecticidal soap.
- Root Rot – Ensure pot has drainage holes and avoid standing water.
Step 8: Enjoying and Using Your Avocado Plant
Even if your avocado tree never bears fruit, it offers many benefits:
- Aesthetic Appeal – The lush green foliage adds natural beauty to your home.
- Air Purification – Like many houseplants, avocados help filter indoor air.
- Educational Value – Growing from seed is an excellent project for children and plant lovers to learn about germination and plant growth.
- Conversation Piece – A sprouted avocado is always an eye-catching plant to show guests.
Tips for Success
- Always start with a healthy seed for faster sprouting.
- Be patient—avocados are slow growers.
- Place the plant in a sunny location and rotate occasionally for even growth.
- Don’t give up if your first attempt fails; not all seeds sprout successfully.
- Enjoy the process as much as the result—watching your avocado seed turn into a tree is rewarding in itself.
Conclusion
Growing an avocado from seed is less about producing fruit and more about enjoying the journey of nurturing a tree from a simple pit. From the thrill of seeing the seed crack open and sprout roots to watching leaves unfurl into a young tree, every stage of the process is fascinating.
With proper care—plenty of light, moderate watering, good soil, and patience—you can transform an avocado seed into a thriving, leafy plant that enhances your home’s greenery. Even if it doesn’t yield avocados, the beauty and satisfaction it brings make the effort worthwhile.
So next time you enjoy an avocado, don’t discard the seed. Give it a chance, plant it, and watch as it slowly but surely takes shape into a tree of your own making.