
Watering is one of the most important aspects of plant care. Too much water can lead to root rot, while too little causes plants to wilt and struggle. For many gardeners, finding the right balance is tricky. That’s where bottom watering comes in—a method that ensures your plants get just the right amount of water by allowing them to absorb moisture from the soil up through their roots. This guide will explain everything you need to know about bottom watering, from how it works and why it’s beneficial, to step-by-step instructions, tips, and troubleshooting advice.
What Is Bottom Watering?

Bottom watering is a simple technique where you water plants from the base rather than pouring water directly on the soil surface. Instead of watering from above, you place your plant pot in a tray or container of water and let the soil soak it up through the drainage holes.
This method mimics how plants naturally draw moisture from the soil in nature, encouraging them to develop deep and strong root systems. Unlike top watering, where water can evaporate quickly or pool unevenly on the surface, bottom watering ensures even hydration throughout the potting mix.
Benefits of Bottom Watering

- Promotes Healthy Root Growth
- Roots grow downward to access moisture, becoming stronger and healthier over time.
- Prevents Overwatering and Root Rot
- Since plants absorb only as much as they need, the risk of soggy soil and fungal issues decreases.
- Reduces Pest Problems
- Moisture-loving pests like fungus gnats thrive in damp topsoil. Bottom watering keeps the surface drier, discouraging infestations.
- Prevents Soil Compaction
- Pouring water on top can cause soil to compact and lose aeration. Bottom watering keeps soil structure light and airy.
- Even Moisture Distribution
- Water spreads evenly from the bottom up, ensuring that all roots, not just those near the surface, receive hydration.
- Keeps Leaves and Stems Dry
- By avoiding wet foliage, you reduce the risk of fungal diseases such as powdery mildew.
Step-by-Step Guide to Bottom Watering
Follow these easy steps to start bottom watering your plants:
Step 1: Choose the Right Pot
- Ensure your plant is in a pot with proper drainage holes at the bottom. Without holes, bottom watering won’t work effectively.
Step 2: Prepare a Water Tray
- Use a shallow tray, basin, or sink large enough to hold your pot. Fill it with about 1–2 inches of water.
Step 3: Place the Pot in the Tray
- Set the plant pot directly in the water and let it sit for 10–30 minutes. During this time, the soil will absorb water through capillary action.
Step 4: Check Soil Moisture
- After 10–15 minutes, gently touch the top of the soil. If it feels moist, the plant has absorbed enough water. Larger pots may need more time.
Step 5: Drain Excess Water
- Remove the pot from the tray and allow any extra water to drain out. Never let plants sit in water for too long, as it can suffocate the roots.
How Often Should You Bottom Water?

The frequency depends on your plant type, pot size, and environment:
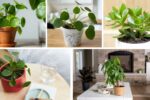
- Indoor Houseplants – Typically every 7–10 days, but always check soil dryness first.
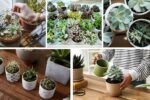
- Succulents and Cacti – Less frequent, about every 2–3 weeks, since they store water in their tissues.
- Tropical Plants – More often, around once a week, depending on humidity levels.
A good rule of thumb is to bottom water when the top 1–2 inches of soil feel dry to the touch.
When to Use Top Watering Instead
While bottom watering is excellent for most situations, there are times when top watering is still necessary:
- Leaching Excess Salts – Fertilizer salts can build up in soil over time. Occasional top watering helps flush them out.
- Dusty Leaves and Soil – Top watering can wash dust from leaves and soil surfaces.
- Seedlings and New Cuttings – Gentle top watering may be better until roots establish enough to absorb water from below.
The best approach is to alternate between bottom and top watering for balanced plant care.
Tips for Successful Bottom Watering

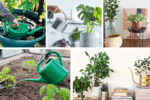
- Use room temperature water to avoid shocking plant roots.
- If your tap water contains high salts or chemicals, consider using filtered or rainwater.
- For large plants in heavy pots, use a bathtub or a kiddie pool for bottom watering.
- Always check soil moisture before watering to avoid oversaturation.
- Combine with a good watering schedule and proper fertilization for best results.
Common Mistakes to Avoid
- Leaving Plants in Water Too Long
- This can lead to oxygen deprivation in the root zone. Always remove pots after 30 minutes maximum.
- Using Pots Without Drainage
- Bottom watering won’t work if water has no way to enter the soil.
- Overwatering with Fertilizers
- Nutrient buildup can harm plants. Alternate between plain water and fertilized water.
- Ignoring Soil Type
- Dense or compacted soil won’t absorb water efficiently. Use a well-draining potting mix.
Bottom Watering vs. Top Watering: Which Is Better?

Both methods have their place in plant care. Bottom watering excels at encouraging root health and preventing surface pests, while top watering helps wash away salts and keep soil refreshed. The ideal approach is a combination of both—primarily bottom watering with occasional top watering to balance soil conditions.
Conclusion
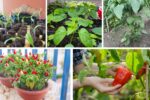
Bottom watering is a simple yet highly effective method to improve plant health, strengthen root systems, and avoid common watering issues like root rot and gnats. By allowing plants to take in water naturally from the base, you create conditions that mimic nature and ensure even hydration. Whether you’re caring for houseplants, vegetables, or flowering plants, bottom watering can make a significant difference in their growth and longevity.

With the right balance of bottom watering and occasional top watering, you’ll have thriving, resilient plants and a healthier garden overall.