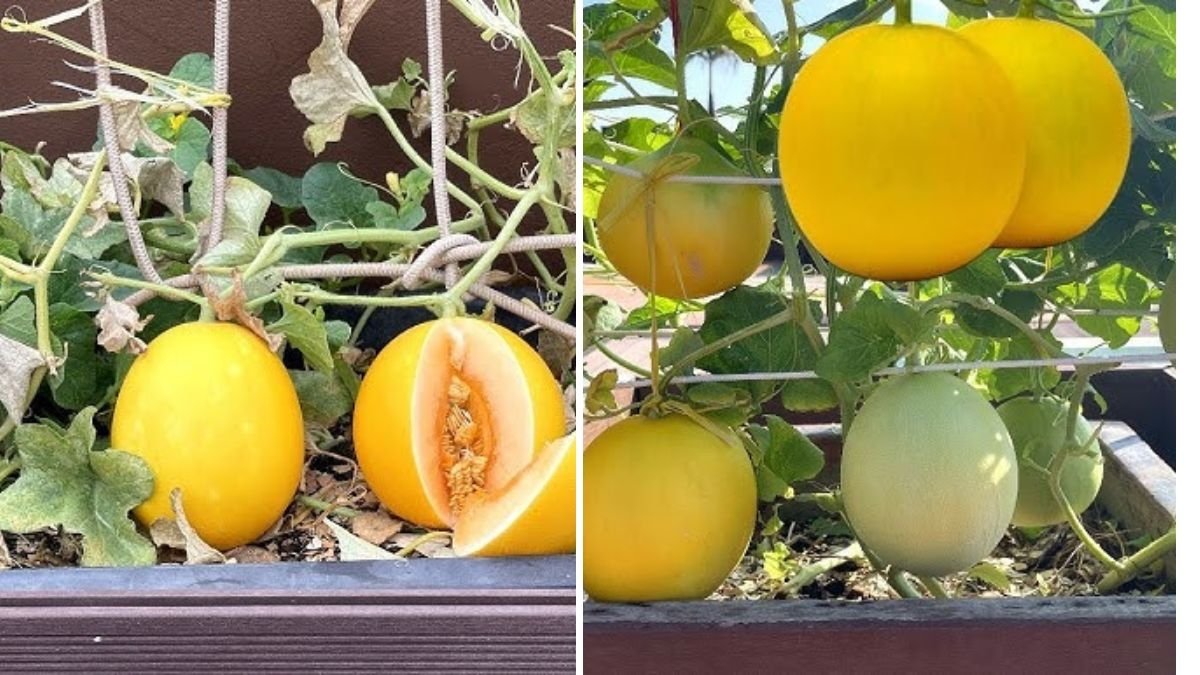
Growing honeydew melons inside a greenhouse is one of the most rewarding gardening experiences for home growers and horticulture enthusiasts alike. With their sweet, refreshing flavor and smooth pale-green flesh, honeydew melons are a summertime favorite — and when grown under controlled greenhouse conditions, you can achieve high yields and consistent quality.
In this guide, inspired by “TLE Horticulture Growing Honeydew Melon Inside the Greenhouse,” we’ll explore every stage of honeydew melon cultivation — from seed selection and soil preparation to pollination, pest control, and harvesting — ensuring you have all the knowledge needed to grow your own delicious melons.
Understanding Honeydew Melons
Honeydew melons (Cucumis melo var. inodorus) belong to the muskmelon family, sharing similarities with cantaloupes but featuring a smooth, waxy rind and pale green flesh. They thrive in warm, sunny climates but are sensitive to sudden temperature changes and excessive moisture. That’s why greenhouse growing offers a perfect environment — protecting them from harsh weather, pests, and inconsistent watering.
Greenhouses create the ideal microclimate that melons need: steady warmth, balanced humidity, and ample light. This controlled setup results in sweeter fruits, faster growth, and fewer issues compared to open-field cultivation.
1. Choosing the Right Variety
Selecting a high-quality hybrid or heirloom variety suited for greenhouse growth is key. Look for compact, disease-resistant types such as:
- ‘Earlisweet’ – early-maturing and known for its rich flavor.
- ‘Honey Brew’ – excellent sweetness and high productivity.
- ‘Arava’ – a popular Galia-type hybrid that performs well under greenhouse conditions.
- ‘Temptation’ – produces smooth, uniform fruits ideal for small spaces.
When purchasing seeds, choose those labeled for greenhouse or controlled environment use, as they adapt better to limited space and artificial pollination methods.
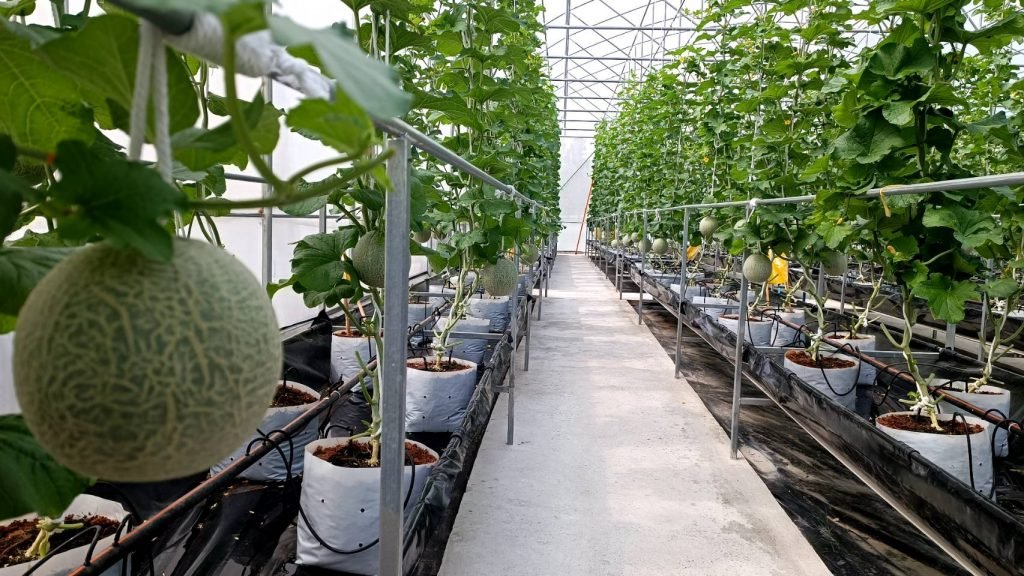
2. Soil Preparation and Bed Setup
Honeydew melons prefer well-draining, fertile soil rich in organic matter. Inside a greenhouse, raised beds or large grow bags work best because they prevent waterlogging and improve aeration.
Ideal Soil Mix:
- 40% loam or sandy loam soil
- 30% compost or aged manure
- 20% coco peat or perlite for aeration
- 10% vermicompost for nutrient boost
Maintain a soil pH of 6.0–6.8 for optimal nutrient uptake. Before planting, mix in a slow-release organic fertilizer rich in phosphorus and potassium to encourage strong root growth and flowering.
3. Sowing and Germination
Start your seeds indoors or directly in the greenhouse about 4–6 weeks before transplanting.
Steps:
- Sow 2–3 seeds per cell in seed trays or biodegradable pots, about 1 inch deep.
- Keep the temperature around 75–85°F (24–29°C) for rapid germination.
- Water lightly and ensure good air circulation to prevent fungal diseases.
- Once seedlings develop two true leaves, thin them to one healthy plant per pot.
Transplant seedlings into their final greenhouse beds when they’re about 3–4 weeks old and the soil is warm (above 70°F).

4. Greenhouse Conditions and Temperature Control
Honeydew melons love warmth and light. Inside the greenhouse, aim for:
- Daytime temperature: 80–90°F (27–32°C)
- Nighttime temperature: 65–70°F (18–21°C)
- Humidity: 60–70%
Install shade nets or reflective film during peak summer to prevent overheating, and use ventilation fans to maintain consistent airflow. A balanced environment minimizes diseases like powdery mildew and supports uniform fruit development.
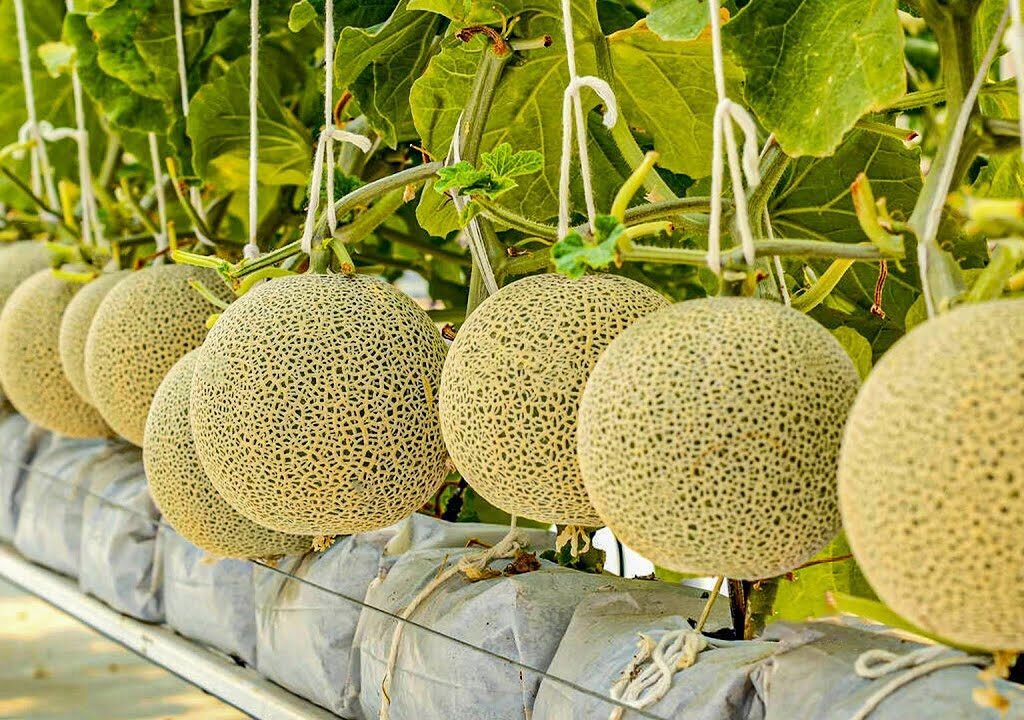
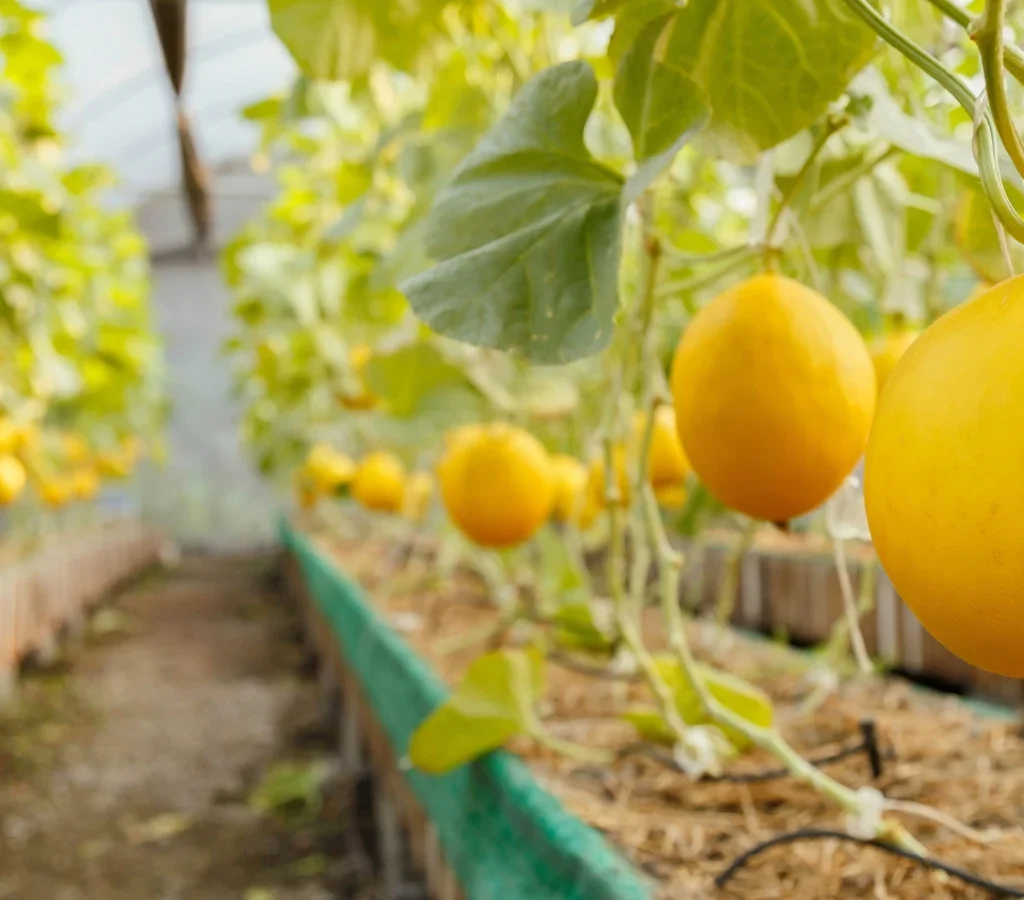
5. Training and Pruning
Melons naturally sprawl, but in greenhouse cultivation, vertical trellising helps maximize space and improve air circulation.
Training Tips:
- Use nylon or jute strings tied to the greenhouse frame for vine support.
- As vines grow, gently twist them around the string or clip them at intervals.
- Remove lateral shoots below the fifth node to encourage strong upward growth.
Once fruits start forming, prune excessive leaves to expose melons to filtered sunlight — this helps them ripen evenly and enhances sweetness.
6. Pollination Techniques
Since bees may not be as active inside a greenhouse, hand pollination ensures fruit set.

How to do it:
- Identify male flowers (with thin stems) and female flowers (with tiny fruit behind the petals).
- In the morning, gently transfer pollen from the male flower to the female flower using a small brush or by touching the blooms directly.
- Mark pollinated flowers with ribbons to track fruit development.
Alternatively, you can introduce small hives of bumblebees for natural pollination if growing at a commercial scale.
7. Watering and Fertilization
Consistent watering is essential — melons require moist but not soggy soil. Use a drip irrigation system to deliver even moisture directly to the roots. Avoid overhead watering, which can promote disease.
Watering Tips:
- Water deeply 2–3 times a week during the early growth phase.
- Reduce watering slightly once fruits start developing to concentrate sugars and improve flavor.
Fertilization Schedule:
- Before flowering: Apply a balanced NPK (10-10-10) every two weeks.
- During fruit set: Switch to a high-potassium fertilizer (5-10-20) to boost fruit quality.
- Add liquid seaweed or compost tea monthly to enhance soil microbiology and nutrient uptake.
8. Pest and Disease Management
Even in greenhouses, melons can face challenges like aphids, whiteflies, spider mites, and fungal diseases.
Prevention and Control:
- Introduce beneficial insects like ladybugs to control aphids naturally.
- Use neem oil or insecticidal soap weekly as a preventive measure.
- Keep humidity under control to avoid powdery mildew and downy mildew.
- Remove infected leaves immediately and maintain good air movement inside the structure.
Regular monitoring and early intervention help maintain healthy plants and reduce chemical dependence.
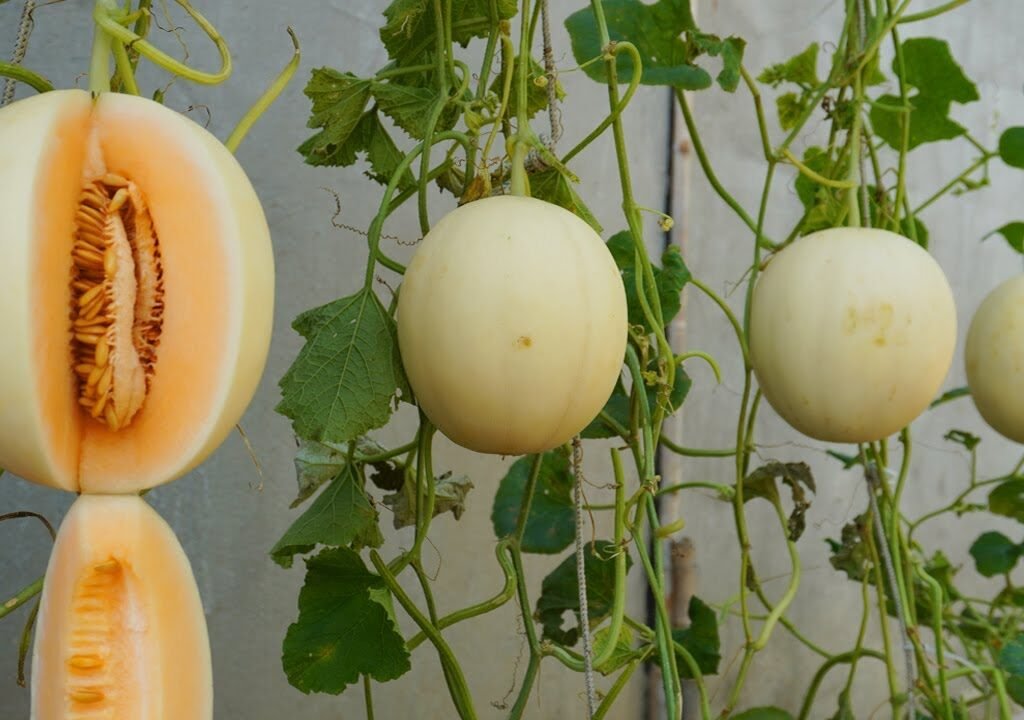
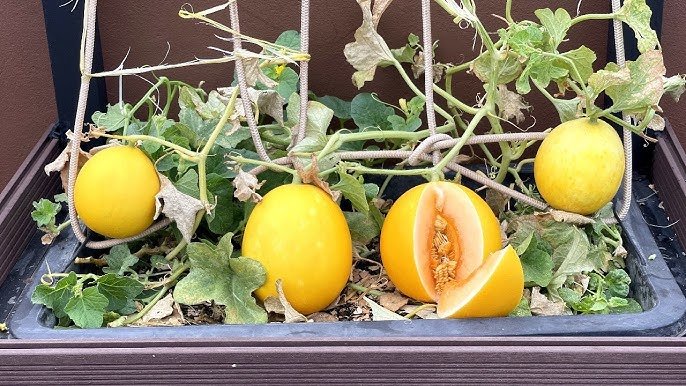
9. Harvesting Honeydew Melons
Honeydew melons are typically ready for harvest 90–110 days after planting. Recognizing the right harvest time is key to achieving peak sweetness.
Signs of Ripeness:
- Skin color changes from green to creamy yellow.
- The blossom end becomes slightly soft to touch.
- A sweet, musky aroma develops.
- When tapped, the melon produces a dull, hollow sound.
Cut the fruit from the vine using sharp pruning shears, leaving a small portion of the stem attached. Handle melons gently to prevent bruising and store them in a cool, dry place for up to two weeks.
10. Post-Harvest Tips and Yield Improvement
To increase yield and fruit quality in subsequent cycles:

- Rotate crops with leafy greens or legumes to rejuvenate soil fertility.
- Solarize the soil between crops to reduce pathogens.
- Use compost-enriched mulches to retain moisture and maintain soil health.
- Regularly prune older vines and replace them with new seedlings to keep the production continuous.
By fine-tuning your greenhouse environment and following a structured care routine, you can enjoy multiple harvests per year with superior fruit quality.
Final Thoughts
Growing honeydew melons inside a greenhouse allows you to experience the joy of harvesting sweet, aromatic fruits regardless of outdoor weather. With careful attention to temperature, humidity, and pollination, even small-scale gardeners can achieve professional-quality yields.
By applying the methods demonstrated in “TLE Horticulture Growing Honeydew Melon Inside the Greenhouse,” you’ll discover that a bit of effort and precision can lead to plump, sugary melons that rival any store-bought variety. Whether you’re cultivating for personal enjoyment or small-scale sale, this controlled approach guarantees consistent, rewarding results year after year.
Leave A Comment